Showing posts with label recipe. Show all posts

Sunday, August 23, 2015

Easy Quinoa Pancakes [Recipe]

I love breakfast recipes that can be quickly made. Fried eggs are my go-to breakfast because they can be made quickly. Serving eggs day after day make me long for something different. Pancakes are my second go-to breakfast. Though they take a little bit more time to make, I have found some recipes that are fairly quick to mix and I always seem to have the ingredients on hand (or can substitute).

A two-ingredient pancake recipe (1 mashed ripe banana, 2 eggs) prompted experimenting with additional ingredients like homemade sourdough starter, stone ground wheat flour, gluten-free flours like buckwheat flour or coconut flour, hempseed protein powder, spirulina powder, or green superfood powder. If the mixture is too dry, I add yogurt or milk (even coconut milk) or more eggs. The recipe below is easy to make and turns out well whether the mixture is too runny or a bit on the dryer side.

Easy Quinoa Pancakes recipe was created on our recent beach trip. I received a few samples of NurturMe Protein Packed Quinoa dried baby food. These individual packets are great for on-the-go and travel. I love that the quinoa powder can be mixed into just about anything to boost protein and nutrition. Just add liquid! During our beach trip, I used the quinoa powder in the pancake batter and also added to my toddler's yogurt. The quinoa powder mixed in smoothly and I could not even tell it was in there. That is a plus in my book! I love the versatility of this powder for any age from baby to adult.


Easy Quinoa Pancakes are an easy breakfast for busy parents and when traveling. To start, a ripe banana is mashed into eggs. Though these are the only 2 ingredients you need for the pancakes to form, you can always add any or all of the additions below.

Easy Quinoa Pancakes

Dairy-free (can omit milk or use nut milks), vegetarian, nut-free (omit nuts)

Yeild: 2-3 servings

Ingredients
1 ripe banana, mashed
2 eggs
1/4 cup quinoa powder (NurturMe Protein Packed Quinoa)

Other Additions (some or all)
1/4 cup yogurt or milk (dairy or non-dairy)
1/2 cup flour (wheat or gluten-free)
1 tbsp hemp protein powder
1 tbsp cup ground flax seeds (can sub 1 tbsp cup chia seeds)
1 tbsp cup chia seeds (can sub 1 tbsp ground flax seed)
2 tsp vanilla extract
1 tsp cinnamon

Directions
  1. Mash banana into the mixed eggs.
  2. Mix in NurturMe quinoa powder.
  3. Add additional ingredients (some or all).
  4. If mixture is too runny for your liking, add more dry ingredients (flour). If the mixture is too thick for your liking, add more wet ingredients (milk, eggs).
  5. Heat griddle or pan to medium heat with butter or oil.
  6. Cook pancakes for a few minutes per side until golden brown.


Disclosure: This recipe was originally posted on All Natural Katie. I received a sample of the product to facilitate this review. No other compensation was received. This post contains Affiliate links at no cost to you. If you purchase through the link, I receive small compensation to help support this blog. I received one of the products mentions above to facilitate the review. All opinions are my own and are honest.


Saturday, May 30, 2015

Homemade Natural After Sun Spray [Recipe + Review]

My 2 year old son and I love to spend time outdoors! Every day, we either play in the yard or go to a park. Spending time outside is a great learning and developmental opportunity. I tend to stay away from sunscreen unless absolutely necessary (we are at the beach or we will be spending hours outside during the sunniest parts of the day). When we do use sunscreen, I use a homemade recipe or a natural brand with the safest ingredients. Nonetheless, the skin can get a bit red after being outside in the sun. That's when I turn to my homemade natural After Sun Spray to relieve red and tender skin. An amber glass spray bottle is the perfect storage container to preserve the properties of the essential oils.


Emmi's Essentials Amber Glass Spray Bottle     
Rating: total green check marks out of 5.

The Good
The Not So Good
Bottle made from glass
Opening too small for scrub brush
Amber glass perfect for essential oil blends

High quality sprayer


Emmi's Essentials amber glass spray bottle can hold 16 ounces of liquid. The bottle itself is made from amber glass, which is recommended for essential oils, and a high quality sprayer with an ergonomic, no-slip trigger and tight-lock closure. Essential oils can degrade faster in a plastic bottle. Plastic can also absorb the cleaning solution or spray, making it difficult to clean the bottles for reuse. The amber color protects the oils and allow you to store your cleaning solutions and sprays longer!


I decided that the empty Amber Glass Spray Bottle would be perfect for my After Sun Spray. After Sun Spray is applied after being the sun. After coming inside the house, we wash hands and face, and then apply the After Sun Spray. I spray the After Sun Spray on the exposure body parts and our heads (we have fine hair and our scalp tends to burn) and then we are off to play! Since the spray is liquid, it does take a few minutes to be absorbed.

After Sun Spray Recipe

Ingredients
1 cup water
1 tbsp aloe vera juice
10 drops lavender essential oil

Directions
Mix all ingredients in spray bottle. Shake well before each use.

After Sun Spray is effective for mild to moderate burns. For moderate burns, reapply as needed throughout the day. If you have a serious burn over most of your body, please seek medical attention.

My Thoughts: I really like the amber glass bottle! The generous size is perfect for homemade cleaners and spray that are used on a frequent basis. The glass is pretty thick, so I am not worried about breaking, though careful handling should be used. Since the opening of the bottle is a bit small for my dish brush, I pump a small amount of soap inside the bottle, fill halfway with hot water, place my hand over the top and shake. I do this a few more times with just hot water to rinse the bottle. Let air dry.


Disclosure: I received the product to facilitate this review. No other compensation was received. All opinions are my own and are honest.


Friday, May 22, 2015

National BBQ Month: Stubb's BBQ Sauce [Giveaway]

May is National Barbecue Month! May is perfect month for barbecuing because it is just warm enough to enjoy being outside, but not too hot yet that being outside becomes uncomfortable. At our house, as soon as it's above 40 degrees, we grilling almost every night. Stubb's is celebrating National BBQ Month by bringing you the recipe below and a giveaway for 4 FREE coupons for Stubb's BBQ sauce!


Craft-made Stubb's BBQ sauce is the leader in authentic BBQ sauces, rubs and marinades. This is one of the few nationally available BBQ sauce brand that is Gluten-Free Certified (carrier the Gluten-Free Organization Cerficiation seal) and contains no high-fructose corn syrup. Most of the time, high-fructose corn syrup is the first ingredient in national BBQ sauce brands. Stubb's is also working with the Non-GMO Project to verify its line of sauces. It is great to see a company put effort to making the ingredients healthier and more natural.

Stubb's has a great selection of recipes to incorporate their BBQ sauces into every day family recipes. My favorite recipe is the Spicy Shrimp Kabobs. I love grilled shrimp and I love grilled pineapple. Pairing these two together with Stubb's BBQ sauce is a great recipe for a weekend grilled dinner or a family gathering. Of course, you can substitute any of the other Stubb's BBQ sauces if you prefer less spiciness.

Spicy Shrimp Kabobs

Ingredients
1 lb large shrimp, peeled and deveined
1 1/2 cups fresh pineapple chunks
1 red bell pepper, cut into 1 inch squares
1/2 Stubb's Pork Marinade
8 wooden or metal skewers

Directions
1. If using wood skewers, soak in water for at least 15 minutes.
2. Thread shrimp, pineapple, and red bell pepper in an alternating pattern on the skewer.
3. Prepare grill for direct high heat cooking.
4. Oil grates and place skewers directly over the heat.
5. Grill for 5-10 minutes total, basting with Stubb's Pork Marinade, flipping often until shrimp are pink and cooked throughout (shrimp cook very quickly over direct high heat). Baste the skewers after each flip.


Enter below for a chance to win 4 FREE Stubb's Coupons.

Please use the Giveaway Tools entry form. Open to US only. All entries will be verified. Duplicate, incomplete and invalid entries will be deleted. 

Giveaway
4 Stubb's BBQ Sauce Coupons ($15 ARV)


Disclosure: I received the product to facilitate this review. No other compensation was received. All opinions are honest and are my own. All Natural Katie is not responsible for companies/sponsors who fail to ship the prize.


Saturday, January 31, 2015

Apple Cinnamon Squares [Recipe]

I am always on the look for healthy breakfast recipes that can be made ahead of time. I also love recipe that can be adjusted based on ingredients I have on hand. I like it when I can customize recipes if I am in the mood for a specific flavor.

Apple Cinnamon Squares are a great combination of a hot, oven baked oatmeal and granola bars that can be taken on the go. You can substitute additions (other dried berries, nuts, seeds, etc.) to change the flavor profile. The ground flax seed and the chia seeds (you can use one or the other or both) are the ingredients that hold the squares together. Make sure you use ground flax seeds, not whole flax seeds.

Note: steel cut oats retain their crunchiness when baked. For softer Apple Cinnamon Squares, combine the milk and oats in a bowl. Soak in the fridge for several hours or overnight to soften the oats up before adding the rest of the ingredients.

Apple Cinnamon Squares

Dairy-free (sub a nut milk), vegan (sub dairy-free milk), vegetarian, nut-free (omit nuts)

Yield: 16 servings
Bake time: 1 hour

Ingredients
2 cups whole milk (can sub dairy-free milk)
1.5 cup steel cut oats
1/2 chopped pecans (can sub other chopped nuts)
1/2 cup raisins (can sub other chopped dried fruit)
1/4 cup ground flax seeds (can sub 1/4 cup chia seeds)
1/4 cup chia seeds (can sub 1/4 cup ground flax seed)
2 tsp vanilla extract
1 tbsp ground cinnamon
1 pound apples, cored and grated (recommend Pink Lady apples)

Other Additions (some or all)
Hemp protein powder (1-2 tbsp)
1 tsp ground nutmeg
1 tsp ginger
1 tsp allspice
1/2 tsp clove powder

Directions
  1. Preheat oven to 350 F degrees.
  2. Line a 9" square baking dish parchment paper.
  3. In a large bowl, combine all ingredients. If pre-soaking the oats, then add all ingredients to that bowl.
  4. Transfer to baking dish, spreading out and smoothing the top.
  5. Bake for about 1 hour until the top is firm and golden brown. Depending on the baking dish, the taller the height of the contents, the longer it will take to bake.
  6. Place pan on wire rack and let cool. 
  7. Cut into 16 bars. Can serve warm or at room temperature.
Recipe adapted from Whole Foods Market.

The original recipe calls for 1/2 cup of ground flax to provide the binding agent that holds these bars together. I received a bag of Nutrigold Organic Chia Seeds, so I decided to substitute chia seeds for ground flax. I used 1/4 cup of ground flax and 1/4 cup of chia seeds. Chia seeds are a great source of omega-3 fatty acids, amino acids, dietary fiber and are a great natural source of many minerals. Their nutritional profile and use in baking is similar to ground flax (flax meal).

I use chia seeds in many dishes, mostly baked items and oatmeal. I love that they can be used as thickeners or sprinkled on top to boost nutrition of the food I am eating. While they usually retain a little bit of their seedy crunch, I liked that I barely noticed them in the Apple Cinnamon Squares. Chia seeds are small and do not really have a flavor to them. Therefore, they are a great way to make meals and baked goods even healthier. Choose raw and organic chia seeds for maximum health benefit.

Disclosure: This recipe was originally posted on All Natural Katie. I received a sample of the product to facilitate this review. No other compensation was received. This post contains Affiliate links at no cost to you. If you purchase through the link, I receive small compensation to help support this blog. Regardless, I only recommend products or services I use personally and believe will be good for my readers. All opinions are my own.


Monday, January 26, 2015

Banana Split Bars [Recipe]

I have been searching for healthy breakfast and snack recipes that are easy to make and can be adapted to whatever you have on hand. In attempt to do more cooking ahead of time and have breakfast and snack items already cooked, I have been trying different breakfast bars and granola bars.

Banana Split Bars are a great take on the traditional granola bar because they also work well as a breakfast bar. You can substitute additions (other dried berries, nuts, seeds, etc.) to change the flavor profile. You can a little bit of a nut butter and maple syrup for a sweeter and nuttier flavor.

Banana Split Bars

Yield: 12 servings
Bake time: 30-35 minutes

Ingredients
1/3 cup dry quinoa + 1/2 cup water, or 1 cup cooked quinoa
2 cup rolled oats
1 tsp ground cinnamon
1/2 tsp ground ginger
1/2 tsp ground nutmeg
1/2 tsp baking soda
1/2 tsp salt
2 small ripe bananas, mashed
1 large egg, beaten
1/4 cup honey (can sub maple syrup)
1 tbsp coconut oil (can sub melted butter)
2 tsp vanilla extract
1/2 cup dried cherries (can sub other dried fruits, chopped)
1/3 cup chopped walnuts or pecans (can sub other nuts)

Other Additions (some or all)
Hemp protein powder (1 tbsp)
Nutritional yeast (1 tbsp)
Flax meal (1 tbsp)
Chocolate chips (1/4 cup)

Directions
  1. Line an 8" square baking dish parchment paper.
  2. Preheat oven to 325 degrees.
  3. Combine quinoa and water in a pan. Bring to a boil over Medium-High heat. Reduce heat to low. Simmer for 10-12 minutes or until all of the liquid has almost been absorbed.
  4. Remove from heat, keep covered, and let rest for 5 minutes. Transfer to a medium bowl and let it cool. (You can cook the quinoa ahead of time)
  5. In a small bowl, combine oats, cinnamon, ginger, nutmeg, baking soda, and salt. 
  6. To the bowl of quinoa, add mashed bananas, egg, honey, coconut oil and vanilla extract. Stir to combine. 
  7. Add the oats mixture to the quinoa banana mixture. Stir to combine.
  8. Mix in cherries, walnuts, and any other additions.
  9. Scoop the batter into the prepared pan and push down into the corners. Smooth top to make even.
  10. Bake for 30-35 minutes until the top is golden brown and a toothpick in the center comes out clean. 
  11. Place pan on wire rack and let cool completely.
  12. Cut into 16 bars. (You can refrigerate for 20 minutes before cutting.) Store in an airtight container in the refrigerator for 1 week or freeze for up to 3 months.
My favorite addition to this recipe was 1 tablespoon of nutritional yeast. Nutritional yeast is a great way to boost protein, fiber, amino acid count and mineral content of the foods that you create. It can be added to savory or sweet dishes. Nutritional yeast has a slight smell of cheese and tastes slightly salty. This makes it a great addition and seasoning to put inside of foods or sprinkle on top for a bit of added flavor. 

Nutritional yeast can also be used for baked goods and sweeter dishes. The flavor is not distinguishable so there is no need to worry about a sweet muffin tasting like cheese. I have been using nutritional yeast in my cooking and baking for several years. I liked the flavor, texture and quality of Sari nutritional yeast flakes and would purchase it.

Disclosure: This recipe was originally posted on All natural Katie. I received a sample of the product to facilitate this review. No other compensation was received. This post contains Affiliate links at no cost to you. I receive small compensation to help support this blog. Regardless, I only recommend products or services I use personally and believe will be good for my readers. All opinions are my own.


Monday, January 12, 2015

Berry Dutch Pancake [Recipe]

I am always looking for healthy breakfast recipes that are easy to make and can be adapted to whatever you have on hand. In my kitchen, that usually means making a recipe "healthier" by substituting ingredients for healthier ones (all purpose bleached flour for stone-ground whole wheat flour or organic buckwheat flour, reducing sugar if possible, substituting apple sauce or banana for some of the oil, etc.). You can also make too many healthy substitutions and end up with something that no one wants to eat again. Don't go too far!

The Berry Dutch Pancake recipe has become my go to Sunday morning breakfast recipe. I have been playing around with some of the ingredients. I love the versatility of this recipe based on what I have available in the fridge and the pantry.

Notes: I have been making 2 servings (half of the recipe) in an 8" Lodge cast iron pan for two adults and one toddler. I have reduced sugar from 1/4 cup to 1/8 cup. Substituting the all purpose flour for buckwheat flour was not preferred by my family.

Berry Dutch Pancake

Yield: 4 servings
Bake time: 18-20 minutes

Ingredients
4 eggs
1 cup whole milk
1 cup all-purpose flour (can sub 1/2 cup whole wheat flour, 1/2 cup all purpose flour)
1/8 cup sugar
1 tsp vanilla extract (optional)
2 tsp cinnamon, ground (optional)
1/4 tsp salt
1 tbsp butter, unsalted
1 cup of berries (can be any berries or a mix)

Other Additions (some or all)
Spices (1 tsp nutmeg, allspice, or ginger, 1/2 tsp cloves, all or some)
Hemp protein powder (1 tbsp)
Nutritional yeast (1 tbsp)
Flax meal (1 tbsp)

Directions
  1. Preheat oven to 400 degrees.
  2. Heat a cast iron pan (or oven proof pan) over high heat. 
  3. Blend together eggs, milk, flour, sugar, vanilla extract, cinnamon, salt and other additions in a blender (can also use a hand mixer).
  4. Pour batter into pre-heated cast iron pan and sprinkle berries on top.
  5. Bake for about 18-20 minutes until puffed and top is set.
  6. Remove pancake from pan and serve. Can top with confectioner's sugar and/or maple syrup.

    Note: the first time I made this recipe, I left the pancake in the cast iron pan, which continued to cook the bottom since cast iron takes a while to cool. The bottom ended up being burned, so next time, I removed the pancake from the cast iron pan right after taking it out of the oven.
Recipe sourced and adapted from Martha Stewart.


Sunday, November 23, 2014

Immunity Boosting Bomb [Recipe]

I have been dabbling in essential oils for several years. This year, I have gotten more serious about building my essential oil collection. Along with essential oils, I am also researching and buying natural immunity boosters like elderberry, raw local honey, herbal teas, etc. Having an arsenal of a variety of immunity boosting products helps to keep our immune systems strong and healthy, so that when we are exposed to germs, bacteria, and viruses, we minimize the impact on our family. My favorite recipe for naturally boosting immunity is the Immunity Boosting Bomb. Containing plant extracts, essential oils, and raw local honey, this drink is easy to take and tastes great.

Immunity Boosting Bomb

Yield: 1-2 ounces

Vegan (leave out honey or sub)
Vegetarian
Dairy Free
Nut Free

Ingredients
1 tbsp elderberry syrup or elderberry extract
1 tsp honey (can sub maple syrup or agave syrup)
30-40 drops echinacea extract
3 drops Immunity Strength essential oil
3 drops lemon essential oil
1 ounce of water (warm or cold, depending on your preference)

Optional Additions
5-10 drops ginger extract
5-10 drops licorice extract

Directions
  1. Mix ingredients in a cup.
  2. Drink 2-3 times a day when exposed to illnesses or when sick.

Norm's Farms offers high quality elderberry products . Their Elderberry Syrup and Elderberry Extract are great additions to my natural medicine cabinet. The Elderberry Syrup is sweetened with a bit of honey and flavored with cinnamon. It is not overpowering, but just enough sweetness that my 1.5 year old son loved to take this syrup when he was sick. The Elderberry Extract is just elderberries and water. The flavor is not bitter, but is not sweet. I have been taking the Elderberry Syrup straight and my son has also take some of it, though he prefers the Elderberry Syrup.

The bottles are sealed for protection. Once opened, the bottles should be kept in the refrigerator and consumed within 30 days. I was a little bit worried about the 30 day use by recommendation at first. Since we are in flu season right now and I am exposed to germs on a daily basis when we go to play dates and story times with other kids, I have been taking the Elderberry Extract every day. I can see going through one bottle of this in 30 days. My bottle has been in the fridge for more than 30 days and it has not started to go bad.

The Elderberry Extract does have a little bit of Malic Acid in it to prevent fermentation. My label on the bottle I received did not disclose this information. I did read this on the Amazon product page and learned about it from the company representative.

I would purchase Norm's Farms Elderberry Syrup and Elderberry Extract again. If you are looking for a way to easily and quickly boost your immunity, look to elderberries.

Disclosure: I received one or more of the products mentioned above to facilitate this review. No other compensation was received. This post may contain Affiliate links. You will NOT pay more by using these links. I will receive a small kick back to support this blog. Regardless, I only recommend products or services I use personally and believe will be good for my readers. All opinions are my own. I am not a medical professional. These statements have not been evaluated by the FDA. Please consult with your doctor regarding taking any supplements. 


Wednesday, October 29, 2014

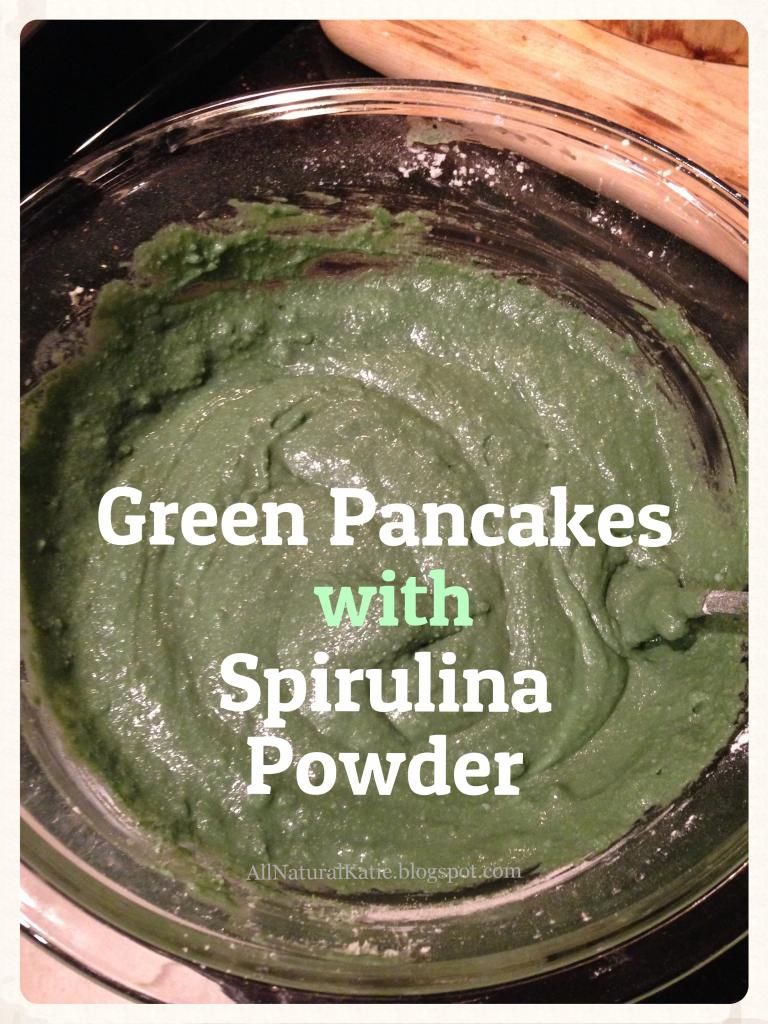
Green Pancakes with Organic Spirulina Powder [Review]


One of my passions and hobbies is cooking, including baking. In high school, my mom introduced me to baking. I did not start cooking until I was living on my own after I graduated from college. After I got married, I started cooking more meals from scratch, incorporating local produce and exotic spices. While cooking is second nature now, baking is making a comeback. I enjoy trying new recipes and tweaking old recipes to make them healthier. Baked goods can benefit from adding a little organic protein powder or organic spirulina powder to boost the vitamins and nutrients. Sari Foods Organic Spirulina Powder is a natural source of vital nutrients and vitamins for a healthy body.


Organic Spirulina Powder             ($25.95, 16oz)
Rating: total green check marks out of 5.

The Good
The Not So Good
USDA Certified Organic
Zip lock does not work
Very fine powder, mixes easily
Plastic bag
Great source of vital nutrients


What is spirulina? Spirulina is a natural blue-green algae (cyanbacteria) powder that is very high in protein and nutrients. The algae forms tangled masses in warm alkaline lakes. The algae is dried and prepared as a food or food additive. This algae can be consumed by humans is one of the most potent nutrient sources available. Purchasing organic spirulina is important to avoid any contamination from the ponds and bodies of water where it grows. Contaminated spirulina, potentially non-organic spirulina can contain contaminants that would make it likely unsafe for children to consume because children are more sensitive to the contaminants.

Sari Foods grows spirulina in natural soda lakes in a remote area of Mongolia and is cultivated with pure desert water from 500m underground. This water is naturally free of environmental contaminants and is naturally rich in minerals and trace elements, making the conditions optimal for spirulina that is both pure and nutrient-dense. The area where the spirulina is grown is free of industry and pollution.

Spirulina is a fantastic source of many nutrients and vitamins that naturally boost the immune system and fight aging and free radicals. Nutrients and vitamins include:

  • Dietary protein
  • Calcium
  • Vitamin B12 (perfect for vegetarians and vegans)
  • Iron
  • Magnesium
  • Selenium
  • Beta Carotene
  • Chlorophyll
  • Phytonutrients
  • Antioxidants and essential amino acids (GLA, Omega 3, 6, 9)

Now that we have given a brief overview of spirulina, let's talk about using the powder. Sari Foods Organic Spirulina Powder is very fine. When I opened the package, the powder poofed out and dusted the counter top, reminding me of very fine all purpose flour. The package has a zip lock top, but it did not work very well. I had a difficult time getting the zipper closed all the way and decided to transfer to a glass container. I would like to see the packaging improved so the zip lock top closes all the way and is easier to close. The powder is so fine that the zip lock needs to work!

I smelled the spirulina powder and tasted a bit on my finger. Very strong smell and even stronger taste. The spirulina powder is very concentrated, so a little goes a long way. One would not necessarily take a teaspoon of spirulina powder and follow with water. The powder can be added to drinks, smoothies, baked goods, etc. 

I have mainly been adding spirulina to baked good like breads and muffins. When I added 1 teaspoon of the organic spirulina powder to pancake batter, it made it very green. Once the pancakes were cooked, the color wasn't as prominent. I think my toddler would find green pancakes fun when he gets a little bit older. I also made homemade raw almond butter and added about 1/2 tsp of the organic spirulina powder to it. Spirulina's deep green color makes it great for natural food coloring. I love the versatility of the spirulina powder. The fine grain of the powder results in easy and quick mixing into your favorite food or drink.

Green Pancakes Recipe
Add 1/2-1 tsp of organic spirulina powder to the pancake batter.

Every week, I am finding new foods and drinks to add the spirulina powder to. As the flu season has started, spirulina powder is a great way to keep my family healthy and strong to combat any illnesses we are exposed to. I keep reminding myself that a little spirulina powder goes a long way. The 16 oz package will last me a long daily with weekly use.

Remember to buy organic spirulina. Conventional and non-organic spirulina can be loaded with heavy metals and toxins that can cause harm to your body. Sari Foods Organic Spirulina Powder is a potent food additive to naturally boost immunity and strengthen your family's health. I would purchase this product again.

Disclosure: I am not a medical professional. If you have any questions or concerns about using this product, please consult a qualified medical professional. Spirulina use does have precautions and warning, so please do your research on any side effects and interactions. I received one or more of the products mentioned above for free using Tomoson.com. Regardless, I only recommend products or services I use personally and believe will be good for my readers. All opinions are my own.


Tuesday, August 26, 2014

How to Make Raw Almond Milk [Recipe]

Over the past year and a half, staying at home full time with my baby and now toddler has made me realize that I spend a lot of time in the kitchen. I love making healthy, homemade items for us to enjoy. Though I appreciate the convenience of pre-packaged food, I receive great satisfaction from making something myself. I have full control over the ingredients. After a recent search for an organic almond milk without any additives or sweeteners (yes, even natural and organic ones), I decided to make my own. Vita Nut Milk Bag is the best nut milk bag for making your own nut milks, raw juices, cold brew coffees and so much more.

Vita Nut Best Nut Milk Bag           ($9.95)
Rating: total green check marks out of 5.

The Good
The Not So Good
Rounded bottom for less waste
When drawn, strings can get in the way
No tearing under heat/squeezing

Ultra-fine mesh for better filtering

Reusable, quick-drying


Making raw almond milk is an easy process with just a few steps. Vita Nut's best milk bag helps to filter out the almond milk from the almond pulp and results in easy and sanitary clean up.

Homemade Raw Almond Milk

Ingredients
1 cup raw almonds, soaked in water (cover almonds and soak overnight, 8-12 hrs)
3 cups of water
Sweeteners such as dates (3-4 dates soaked for 1 hr), raisins, prunes, agave, honey, maple syrup (optional)
Vanilla or almond extract (optional)
Pinch of sea salt, to enhance flavor (optional)

Directions
  1. Place almonds in a small bowl and cover with water. Soak overnight, 8-12 hours. Can also soak for 1-2 hours, if in a pinch.
  2. If using dates, raisins or prunes as your sweetener, place those in the blender with a little bit of water and blend on highest speed until creamy. 
  3. Drain and rinse the almonds and place in blender with 3 cups of water, any sweeteners, vanilla/almond extract and sea salt, if using. Omit sweeteners for unsweetened raw almond milk.
  4. Blend on highest speed for 1 minute.
  5. Place the milk bag over a large bowl and slowly pour the almond milk mixture into the bag. 
  6. Hold the top of the bag closed and squeeze the bottom of the bag to release milk. Twisting the bag can also work. This creamy liquid is the raw almond milk.
  7. Pour into a glass or airtight container and store in the refrigerator for up to 3-5 days. Shake container very well before using because the almond milk separates when sitting. 

Photo Directions
Drain and rinse soaked almonds. Place in blender with 3 cups of water and any other additions.


Blend on highest speed for 1 minute.


Place milk bag over a large bowl and slowly pour the almond milk mixture into the bag.


Let the almond milk drain, then squeeze the bottom and twist the bag to release the rest of the almond milk.


Notes
  • A food processor can be used instead of a blender. The liquid tends to leak out, so you might want to do 2-3 batches.
  • Cheese bag, cheese cloth, flour sacks, etc. can also be used. Cheese cloth tends to tear with twisting, so be careful when squeezing and twisting to release the almond milk.
  • Recipe can be used to make any nut or seed milk. Most seeds do not need to be soaked or strained in the nut milk bag because they blend well with water. 
  • Feel free to add any other flavorings or sweeteners to the blender.
  • Liquid sweeteners can also be added to the strained milk.
  • Almond pulp can be saved and used as an addition to things like yogurt, oatmeal, baked good, or dried/dehydrated to make raw almond flour.

I really liked using the Vita Nut milk bag to make my homemade raw almond milk. The bag was easy to use. I did not worry about it ripping or tearing when I was squeezing the almond milk. The almond pulp inside the bag was dry, meaning that the bag and my hands did a good job at straining the almond milk. When I was done straining the almond milk, I scooped out the almond pulp to save for muffins. I turned the milk bag inside out to get all of the almond pulp out. The rounded bottom helped to scoop everything out and resulted in easy clean up. A little natural soap and water and the milk bag was clean. The milk bag dried quickly and I reused it later for removing liquid from frozen spinach.

The strings at the top help to keep the bag cinched, but tend to get a bit long when they are drawn. I found that they got in the way while I was trying to squeeze the milk out. Maybe next time, I will tuck the strings into the bag.

Vita Nut best milk bag is the secret to quick and easy homemade nut milks, raw juices and more! No tearing, less mess and frustration, and easy clean up make Vita Nut milk bag the perfect accessory for your milk and juicing endeavors.

Disclosure: I received one or more of the products mentioned above for free using Tomoson.com. Regardless, I only recommend products or services I use personally and believe will be good for my readers. All opinions are my own. 


Monday, July 28, 2014

Healthy Whole Wheat Date Muffins [Recipe]

Ever since I have become a mom, a healthy breakfast or healthy snack that I can grab on-the-go ensures I have enough energy to make it through the day. Being able to give my child the same snack is even better! This muffin recipe originally started out as a bread that I made for years. I came across the Whole Wheat Date Nut Bread recipe in Whole Living magazine. After a while, I started experimenting with different additions and substitutions. I love the versatility and ease of this recipe. Everything I added or substituted made the bread even better. The bread is always delicious and moist.

I am sharing the original bread recipe and my adaptations (in blue). I also list some of the additions/substitutions I use every time and some that I sometimes use. My recent favorite addition (to add more nuts to my 16 month old son's diet) is to grind up nuts to a meal and add them into the batter.

Note: I have reduced the amount of sugar in the recipe by 1/4 cup and it can potentially be reduced to 1/2 cup. Sugar does play a role in baking, so be careful how much you reduce it.

Whole Wheat Date Nut Muffins

Yield: 18-24 muffins (depending on how full you fill the cups)
Bake time: 15 minutes

Vegan (sub flax egg or banana)
Dairy Free (sub flax egg or banana)
Nut Free (leave out nuts)

Ingredients
1 1/2 cups hot water
1 cup pitted dates, chopped (can also sub other dried fruit)
1 large egg (sometimes I use 2 small eggs; can sub flax egg or banana)
2 tablespoons vegetable oil (I use coconut oil; can sub apple sauce (2-4 tbsp))
1 teaspoon pure vanilla extract
1 cup all-purpose flour (I sub buckwheat flour or other whole grain flours)
1 cup whole-wheat flour (can sub other whole grain flours)
1 teaspoon baking soda
3/4 teaspoon coarse salt
1 cup pecans, chopped (can sub any other nuts or leave out, whole or ground to a meal)
3/4 cup brown sugar (can reduce to 1/2 cup, can sub turbinado)

My Additions (I usually put in)
Nuts of any varieties (whole or ground)
Spices (1 tsp nutmeg, allspice, cinnamon, or ginger, 1/2 tsp cloves, all or some)
Hemp protein powder (2 tbsp)
Nutritional yeast (1 tbsp)

Other Additions (I sometimes put in)
Flax meal (2 tbsp)
Hemp seeds (2 tbsp)
Dried fruit (like raisins)
Molasses (1 tbsp)

Directions
  1. Preheat oven to 350 degrees. Coat a 9-by-5-inch loaf pan with cooking spray.
  2. In a medium bowl, pour hot water over dates (and any other dried fruit) and let stand until slightly softened, about 5 minutes.
  3. Whisk in egg (or flax egg or banana), oil (or apple sauce), and vanilla (and any other wet ingredients).
  4. In another bowl, stir together flours, baking soda, salt, nuts, and sugar (and any other dry ingredients).
  5. Fold wet mixture into dry until just combined.
  6. Fill muffin pan about 3/4 full and smooth the top with a spatula.
  7. Bake for 15 minutes for both regular and mini muffins, or until a tester inserted in the middle comes out clean. (bread bakes for about 65 minutes)
  8. Let rest 10 minutes, then remove and move to a cooling rack.


Related Posts Plugin for WordPress, Blogger...